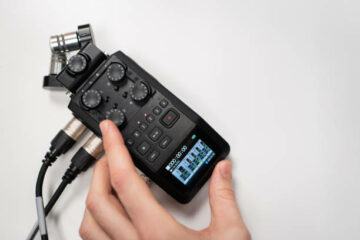
How to Set Up a Professional Recording Studio at Home
Ready to take on your audio projects at home? Discover the simple steps you need to follow in order to build a great working recording studio from basics!

Voice recorders have been there for the longest time you can remember, right? They are therefore one of the oldest audio technologies still available and in use today. Journalism, education, business and personal use are some of the areas still making good and progressive use of these gadgets.
With more research over the years, they have continued to become feature-rich, smaller and compact, and seamlessly integrate with digital platforms. That is even how we get digital voice recorders that are more versatile today.
While these gadgets still play an important role in capturing and preserving voice recordings among other forms of audio recordings, they are not immune to challenges. Voice loss is one such challenge you must be wary of.
Here are some elements to consider before deleting voice records:
Of course, yes. Recovering digital voice recorder data is easy and straightforward. You must however make this happen really quick from the time you realize data loss.
If you are taking some time to learn some tricks to use from this article, you must stop using the device or memory card immediately. This is to preserve the device from any form of interference including data overwrite. Check out some steps to restore a formatted SD card here. Or go straight to the methods below to recover data from SD card or retrieve your voice recordings from PC.
If you have been using the PC Voice Recorder, then there are high chances that your deleted files are still in the recycle bin.
Double click the recycle bin icon to open it. Scroll down and up to check if your files are there. Select the voice recordings you want to recover to highlight them. Hit the “Restore” button to recover them.
Remember, this action is only possible if your files were deleted in less than 30 days ago. Also, if you did not delete them with the “Shift + Delete” shortcut.
Well, you may have tried to recycle bin but cannot get your recordings because you permanently deleted them using the “Shift + Delete” shortcut.
Windows systems come with inbuilt File History; a recovery system that makes it easier to recover original versions of data. If you have file history activated on your windows computer, then go to the start menu and type “File History” to begin.
Click “Restore your files with file history” and hit the “Restore personal files.” Navigate to where the music option is displayed and look out for the recordings you want to restore. Once you have selected all the recordings, hit the green button to restore them.
This is one of the most effective recovery methods for lost voice recordings. Maybe you can see this guide to the best SD card recovery tools to learn more about this software. You will need to download and install the software first on a windows PC. Once that is done, connect the SD card where your recordings were stored before deletion to the PC.
Launch Disk Drill by Cleverfiles and select your memory card from the list of available volumes then hit the search button. The scan should start and not take too long to find your recordings.
Once done, you will get a preview window with all the files that have been found. Choose the recordings you want to recover and tap the “Restore” button. This will complete your recovery process. Remember to choose a different location to restore your files.
Many people prefer to use this method with the best data recovery tool because it guarantees a high chance of recovery. Also, it is more dependable as it keeps your data safe and does not cause any security issues. In brief, the tool is:
Do not wait until you have lost data from your digital voice recorders. This is because prevention is better than treatment. Use the following tips to prevent loss of voice recordings.