How to Navigate Audio File Recovery on Digital Voice Recorders
Use this step-by-step instruction here to learn how to navigate audio file recovery on digital voice recorders.

Are you an aspiring musician looking for a way to record and produce your music in the comfort of your own home? The answer lies with home recording studios. However, setting one up can seem complicated, but it doesn’t need to be! With creativity and careful planning, you can quickly assemble all the necessary components without emptying your pockets.
In this blog, we’ll explore some ways you can get started with setting up a quality recording studio in your spare room. Don’t let gear or budget worries prevent you from creating great music. Read on and learn how to set up the studio of your dreams!
Setting up a home recording studio will allow you to make music whenever you want. If you want to know where to start follow our guide below:
An average household has two to three rooms, and one of them might be the perfect spot for your record studio. However, aside from the cost, there are some factors you must consider before you begin this transformation. These are:
Once you’ve found the one that fits the bill, you can begin envisioning what your record studio will look like.
You should clear the room before setting up your stations and putting art/stickers for decoration. Therefore, you must work on removing everything off the walls, clearing the floor space, and removing vibrating objects.
Remove as many objects as possible if you plan to set up your studio in your bedroom or living room. Once done, you’re free to decorate the room and place some custom window decals and posters of artists and musical inspirations. Stick them on bare windows to give that feeling of a professional record studio.
For more durable stickers, choose vehicle window decals since they can be installed or applied on any surface. These are also more resistant to wear and tear and won’t fade away quickly!
Acoustic treatments are paramount in every recording studio. These diffuse or absorb sound to improve a space’s acoustic quality. You can find them in different forms and are typically made from high-quality materials, such as foams, rock wool, or fiberglass. You can find them in most home improvement stores, too.
You’ll need several acoustic treatments in your studio to prevent unwelcome noises. These are typically placed on walls, close to surfaces that create echoes and reflections. You may also add other acoustic treatments, depending on the sound quality you’re going for.
Seven types of acoustic treatments:
Each acoustic treatment has a different purpose, but all are designed to prevent unnecessary sounds from affecting your recordings while in session.
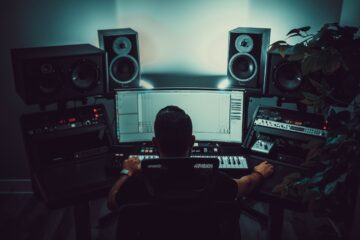
Now’s the time you can arrange your workstation. It’s best to focus in this area since you’ll be doing most of your work on it. For starters, any desk or table lying around the house is excellent. However, you will want to change them ASAP into something more functional.
It should have enough room to fit your equipment, like computers, speakers, and other gadgets. Place your working station against the wall with a window or soundproof curtains so incoming sounds won’t affect your recordings. You may also add some acoustic treatments on the walls near the desk.
Furthermore, you’ll also need an ergonomic chair to protect your posture, prevent back pain, and give you a comfortable seat for long work hours.
Since it’s the earlier days and you don’t have a lot of equipment and gear, this part will be easy. Unfortunately, expanding and buying more gear will only get complicated. Therefore, you need to understand how everything fits into the puzzle.
Signal flow is the central concept you should focus on, as it will explain the path through which sound travels from one end. Learning about signal flow will help you efficiently connect your gears so that it sends sound from one source to the other, creating great recordings.
Your studio monitors are the most significant factor determining the result of your composition and mixes. Next to the acoustic treatment, you should know how to position it effectively to get the best and most optimal sound quality and accuracy when recording.
Some factors you need to remember when positioning your monitors include:
The best way to solve this issue is to opt for studio monitor stands. These must be adjustable, so you can quickly achieve the right height, angle, and width of the monitors.
Below are some accessories you should add to your list of must-haves without spending too much money:
Our thoughtfully-curated tips are here to guide beginners who need help figuring out where to start with their home recording studio. More elements still need thorough consideration, but starting with the basics is highly recommended. It’s also important to stay organized and know what equipment you need for your projects. Once completed, set up a professional home recording studio where you can improve your craft and create wonderful music like a master!