How to Navigate Audio File Recovery on Digital Voice Recorders
Use this step-by-step instruction here to learn how to navigate audio file recovery on digital voice recorders.
When setting up a home studio, one of the important steps I advise people to consider is soundproofing the room. Having the best studio equipment matters less if it cannot help you to produce high-quality recordings. A conducive studio, free from noise and other sounds gives recordings better quality because studio microphones are very sensitive and can pick up even faint background noise. In this post, I have outlined the several steps you can take to ensure you effectively soundproof a recording studio. Note that we have another guide describing how to soundproof a room specifically for drums. Enjoy.
Gaps or cracks around a room are one of the sources that allow sound no enter or escape from a room. Though most people recommend dealing with gaps as the last step, I would advise you to start first by sealing gaps and cracks before moving to other soundproofing options.
To locate gaps and cracks you can start by looking around the room. There are pretty obvious places like openings in the door and windows that you can easily spot. Smaller cracks will be hard to spot. To easily identify them, you can ensure the room is dark while the adjacent rooms have light. Check and mark all cracks that will allow in light to the room. This is the easiest option for identifying cracks.
Another option is to use candlelight and pass it over the areas you highly suspect to have cracks or small openings. This option is best to use in a room that is isolated from the rest of the house where the wind is blowing around the room. However, you can also blow wind using a fan to identify the cracks. When the candlelight flickers, mark the area. This option will require time and patience to effectively seal the cracks.
After identifying and marking the gaps and cracks around a room, there are several ways to seal them. For gaps around the door and window, you can use a soundproofing weatherstripping kit or the keep fun indoor self-adhesive foam. These two options are great for blocking noise entry around the door and windows. Under the door, use the Suptikes Door Draft Stopper to effectively stop noise entry. For windows, there are several ways you can go about soundproofing. One of the cheapest methods is using soundproofing curtains like the NICETOWN noise reducing curtains. These offer a quick easy way of soundproofing a window. Apart from soundproofing curtains, check out other methods of soundproofing a window.

Small cracks and gaps can easily be sealed by a soundproofing tape like the Adhesive Foam Tape, or you can also use caulk. when choosing an acoustical sealing caulk, choose one that does not easily crack when applied. This prevents the gaps from opening up over time due to heat or expansion. I would strongly advise you to choose silicon caulk, due to its flexibility. One great silicon caulking sealant is the Sashco Big Stretch, which is very effective in sealing air gaps with very minimal shrinkage.
Adding mass to the walls, floors, and ceilings is one of the basic ways to soundproof any room though it will definitely come with some cost. Adding mass simply means to add weight or density to the boundaries of the room. The reason for adding mass to make it hard for the sound energy to penetrate or leave the room. It also increases the density of the structure, and thus makes it to vibrate less in response to sound energy.
If you are building a recording studio from scratch, then you can simply build thicker walls by utilizing dense materials like concrete. However, if you already have a professional recording studio set up, adding mass is the next option.
There are several ways of adding mass to a structure. One is to utilize mass-loaded vinyl (MLV) also known as sheet block. Mass loaded vinyl is a material specifically made to block noise and when installed correctly and in a single layer it could cut noise from and out of a room by up to 30dB. The TMS Mass Loaded Vinyl is a great option you can check out.
Apart from mass-loaded vinyl, you can also use fiberglass between the walls you are soundproofing. Fiberglass is very good at blocking sound and it also helps insulate your home. If you can, use mass-loaded vinyl on both sides of the walls with fiberglass in the middle. This should be very effective in blocking sound into and out of the room.
The material you choose to add mass should be dense enough to prevent sound from passing through, but it should also keep the sound from reflecting around the room.
The denser a material is, the better it is at blocking noise. The effectiveness of a material to block noise is measured in Sound Transmission Class (STC). The higher the STC value, generally the better the material is at blocking sound. However, this might not always be correct because STC only considers frequencies that are down to 125 Hz. This might not be reliable if low-frequency sound sounds that are below 125 Hz are taken into account. It is also important to note that you cannot add STC ratings. STC ratings of materials are logarithmic values that cannot be added.
Below are some of the STC Examples.
| STC Rating | EXAMPLE |
|---|---|
| 25 | Normal speech will be easy to hear and understand |
| 30 | Loud speech will be easy to hear and understand |
| 35 | Loud speech will be heared but not understood |
| 40 | Loud speech will be faint |
| 45 | Loud speech is not heard, however, heavy traffic or music systems will still be a problem |
| 50 | Very loud sounds coming from a stereo or music instrument will faintly be heard |
| 60+ | Excellent soundproofing |
Apart from adding mass, using Mass-loaded vinyl, drywall or fiberglass, vibrations due to low-frequencies can still find their way into the recording microphone. To deal with vibrations before they reach the microphone, shock mounts help in suspending the microphone and absorbing these vibrations. However, to slow down or stop the vibrations, the best way is to damp the recording studio.
Damping is the process of treating a surface so that it can absorb and dissipate vibrations caused by sound, especially the bass frequencies. Vibrations can travel along the drywalls, or even along a wooden frame and end up in the microphone stand where they can easily be absorbed by the microphone.
Several materials help in damping. However, the most popular one is the Green Glue Noiseproofing Compound. The green glue is applied between two rigid materials, for example, drywall or fiberboards. When sound waves hit the rigid material, the rigid materials shift in different directions. This results in shear force within the Green glue, and because of its design, the soundwaves are converted to frictional energy and lastly heat.
Apart from Green glue, other viscoelastic materials like PVS, mass-loaded vinyl, or constrained layer foam composites can offer alternative ways of damping a room.
Decoupling structures achieves the same effect as damping. It prevents vibrations from traveling from one object to another. However, instead of applying viscoelastic materials, decoupling isolates objects by use of sound-deadening materials at the contact points or decoupling an entire room.
The most simple way of decoupling is using foam cushions or dense rubber below your equipment. Foam cushions/dense rubber are placed below a speaker, subwoofers (see also the best 10 inch subwoofer) or other sound equipment to reduce vibrations transmitted to the structure. One great option I use to decouple studio monitors is the Sound Addicted SMPad 8. They are great, do not collapse because of my heavy speaker, and do a very good job of absorbing vibrations and cabinet resonance.

Apart from decoupling equipment, you can also decouple an entire home recording studio. Decoupling can be done on the walls, floor, and ceiling.
For walls, there are several ways of decoupling. The most effective way of decoupling a wall is using the double stud method, which is also one of the ways to build a “room inside a room”. This is made possible by building two separate stud walls. A small space is left between the two walls to avoid vibrations passing to the other wall. The downside of this method is that a lot of space is lost. Other methods of decoupling a wall include the staggered stud method as shown below. Another method is using resilient clips and hat channel if you want a simple construction. Resilient clips and hat channel are added to one side of the wall and absorb vibrations hitting the drywall.
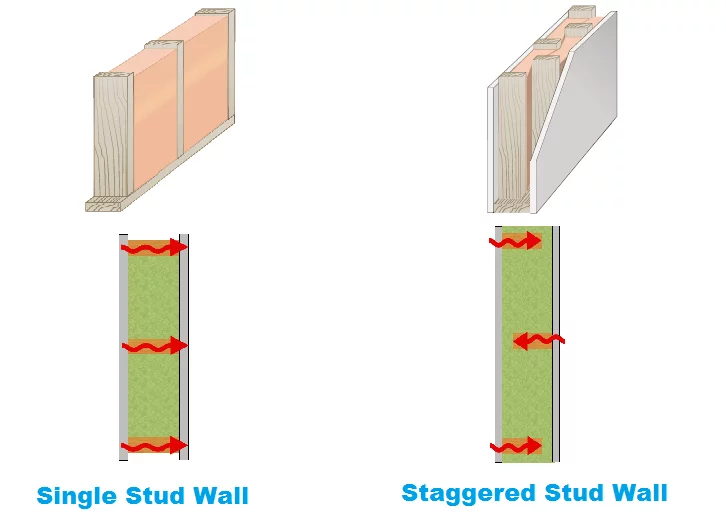
Single stud vs Staggered stud wall for soundproofing
The idea of double walls and staggered studs can also be applied when decoupling a floor or ceiling. You can also build a floating floor with the help of U-Boats. The U-Boats go underneath the floor/ceiling joists and help in reducing sound transmission and absorbing low-frequency sounds from moving to other structures. The Auralex Acoustics U-Boat Floor Floaters are a good option you can use to get better results.
Computer and other electronic noise can also affect your recordings and result in microphone hiss. Sealing gaps, add mass, damping vibrations, decouple structures and equipment can only do less to properly soundproof this kind of noise. However, there are other effective methods you can try. below are some solutions you can try to maximize your soundproofing.
Maximizing acoustic separation can be effectively done by using separate rooms. One room for recording and the other contains the recording gear. When recording vocals, the vocalist will be in the recording room while everything else that is not needed there will be in the other room. The goal of having separate rooms so to increase isolation by keeping any other sound-making objects out.
If having separate rooms for your studio is not a feasible idea, there are other ways you can maximize acoustic separation. First, you can increase the distance between the recording equipment like microphones and other gear within the room. Second, you can change the mic such that it is pointing away from sources of sound.
Isolation boxes or Isobox, solve different problems that a studio rack will not do effectively. An Isobox creates a soundproof barrier by keeping a computer and other electronic noise inside. An Isolation box can also keep the computer at optimum running conditions by preventing it from overheating. An Isobox that can soundproof and cool down equipment is effective but also comes with a high price tag.
However, if you are determined, you can build your Isobox for your recording studio. This can be done by utilizing products such as MDF boards lined inside with sound-deadening materials such as acoustic foam.
Vocal booths are a great way of eliminating or reducing background noise. These structures allow you to record or test instruments without worrying about ambient noise leaking into the studio microphone.
There are three types of vocal booths you can use in a studio.
The first is the permanent booth that is built into a recording studio so they become permanent structures that cannot be moved or removed. This type of booth can be pricey to install, but you can cut the spending by taking it as a DIY project. The second type of vocal booth is the modular booth. A modular booth just like modular homes can easily be assembled once it is delivered to you. The main advantage of modular vocal booths is that they can also be disassembled and moved to a new location. The last type of vocal booth is the portable booth. These are mobile sound booths like the Pyle Recording Shield Box or the Neewer Microphone Isolation Shield. They are light and can be carried by one person. They are built from small enclosures that cover the microphone to reduce sound leakage but also reverberation and echo.
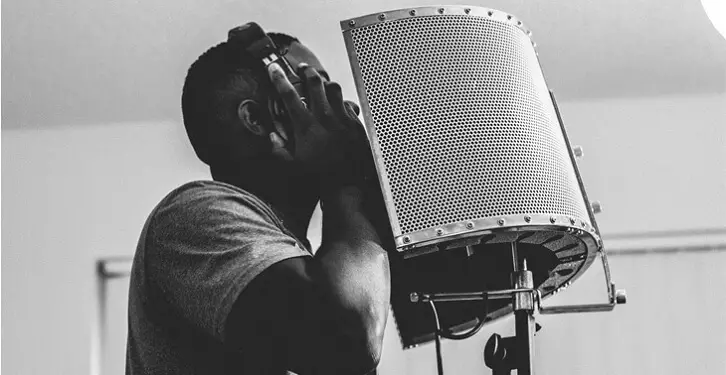
Portable studio microphone isolation shield
Soundproofing and sound treatment are two methods that can be confusing especially in a recording studio setting. Let’s the difference between these two terms real quick.
Soundproofing involves reducing the entry and leaving of sound by using sound blocking materials.
Sound treatment involves using materials on the wall and ceiling of a room that helps in absorbing excess sound frequencies and prevent reflections in the room.
The key difference between soundproofing and sound treatment is that one is used to keep sound from coming in or going out and the other is used to minimize bouncing of sound between surfaces in a room.
There are many ways of soundproofing a room. Though some involve complex work, some are simply DIY projects you can attempt in your recording studio and notice a change. in this article, I have gone through several ways you can soundproof a studio. Some will work in your studio while others might not work effectively. It’s worth pointing out that even though you’ve done your best to soundproof your studio, some basic things like pop filters and windscreens can still be helpful to take you the extra mile. When you soundproof a recording studio, not only do your tracks sound professional, but you also save yourself the time taken to edit/mixing the tracks.
Soundproofing your car? Check out our guide.