How to Charge AirPods Without a Case
Discover the truth about how to charge AirPods without a case. Uncover myths, find alternatives, and safeguard your audio experience.
Setting up your first home recording studio should not be hard. With the right equipment, creating and producing your music should be very simple. When starting a home recording studio, you have hundreds of different products to choose from.
So, where do you even start?
In this guide, I will share a list of essential home recording studio equipment (see here for the best synth for hip hop) to get you started. While this is not an exhaustive list, it covers what you mainly need to start your home recording studio and get it up and running. So, if you are a beginner here looking for the where to start from, this list should give you an idea of what is needed to get your home recording studio up and running (or you could take a look at some home recording studio bundles to get up and running, they will help to minimize the upfront cost of your home recording studio).
So sit back and relax because you are in the right place.
For a Quick Start, Check out Our Best Home Recording Studio Packages
Before computers, setting up a studio for recording took up to several hours. With the advancement of technology, it now takes less time to get you up and running to record the next big hit.
All this thanks to computers.
The computer is the heart would be the heart of your home recording studio. In this era, it would be tough to get anything to work without a computer. The computer may be a Laptop or PC. It can be based on Windows or Mac.
If you own a powerful computer, then you have crossed out one essential equipment from this list. If you are looking to buy a computer or laptop to transform your garage band into a production powerhouse, then you should buy one that can handle your DAW (next requirement) since they require a lot of processing power.
So, which computer should you get?
Most computers can run a number of recording programs out there. Technology is changing every day and a good computer today might not hold up in the future. However, before getting yourself a new computer, always consult the manufacturer’s website and check the minimum requirements needed to run a recording program you will have selected. Other than that, if you are on a tight budget, always get as much RAM and high processing power you can afford.

A digital audio workstation, DAW for short, is the program you will be using to record, edit, mix and master your music. There are a lot of DAWs available on the market like the Cubase Artist and Cubase Pro, Pro Tools, and REAPER, and all come with their strengths and weaknesses.
However, choosing the recording program of your choice will depend on your computer specifications, your budget, and style of music. Before deciding your digital audio workstation, make sure it can run on your computer without problems.
There are a ton of free DAWs you can pick from if you are testing the waters or you are dealing with a tight budget. A number of the best free DAWs I can think of are Garageband (Mac), Audacity (Windows, Mac, Linux), Pro Tools First (Mac, Windows), Cubase LE (Mac, Windows), Cakewalk by BandLab (Windows 7 or higher/64-bit only), MU.Lab (Mac, Windows), Tracktion 4 (Mac, Windows, Linux), PreSonus Studio One 3 Prime (Mac, Windows), Ardour (Mac, Linux).
On the other hand, if you are committed to home recording, investing in a good paid version could work wonders in your home studio setup. Some of the best DAWs are Ableton live 9 suite (Mac, Windows), FL Studio 12 (Windows), Pro Tools 10 (Mac, Windows), Propellerhead Reason (Mac, Windows), MOTU Digital Performer (Mac, Windows), Steinberg Cubase (Mac, Windows), Cockos Reaper (Mac, Windows, Linux), Avid Pro Tools (Mac, Windows).

Ableton live 9 suite
If you are done selecting and setting up your chosen DAW software, then next you will need an audio interface. If you need some recommendations for an audio interface for Ableton, you can check out our guide here in another article.
An audio interface is a device that will get audio into your computer when recording and out during playback. An audio interface can be a PCI card that you install in your computer, a device you connect to your computer via Firewire or USB, or a combination of both.
Computers come with a built-in audio interface or soundcard. These are fine for watching movies or listening to music (but you don’t really need a studio interface to listen to good music, a headphone amp is enough), but they are not very suitable for recording. Because of this, an external audio interface is vital in your home studio.
Before deciding to get an audio interface, you should check if it is compatible with your computer. Look at your computer connections to know your available options.
If you do not want to re-buy a new audio interface in a couple of years, do not choose a little interface with only two microphone inputs. You should think about expandability as well. Choose an audio interface with enough inputs and outputs to handle both your current and future needs.
You should also check if your chosen audio interface plays nicely with your preferred DAW software or your computer.
When just starting, an all-in-one audio interface is a great choice. After you have settled and needed to expand, you can get stand-alone units as you grow into a professional studio.
All-in-one audio interfaces will incorporate headphone amps, mic preamps, monitor management, and even digital conversion among other features.
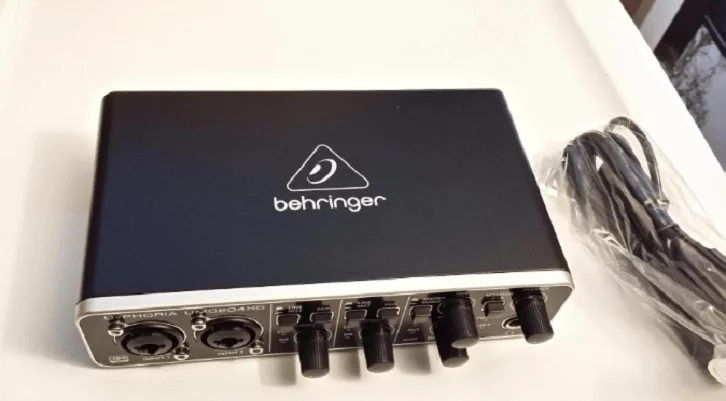
BEHRINGER UMC204HD Audio/Midi interface
While they may look like your standard home speakers, in the pro audio world they are referred to as studio monitors or nearfield monitors. Compared to the typical home speakers that will accentuate different frequencies, studio monitors are designed to provide flat frequency response. Meaning they do not cut or boost certain frequencies.
Studio monitors are one of the essential pieces of equipment in a studio setup. If you end up getting a set of cheap speakers that affect the sound in any way, you may end up with a mix that sounds only good on your speakers but not anywhere else.
That said, you should invest a decent amount of money to get good monitors. You can choose from many options out there. But, I would never recommend you to get computer speakers over studio monitors (or even over 2.1 speakers). Any studio monitor like the Mackie CR3-X would be better than a set of computer speakers.
Other than the price of a studio monitor, there are also other aspects such as the shape or the size of the monitors you need to consider. A bigger studio monitor will reproduce the low frequencies better than a small one.

If you are like most home studio owners, most of your recordings will involve a microphone. If you are also interested in Best Microphone for Choirs, we have an article for that.
To do this, you will need to get a good dynamic or condenser mic.
Dynamic microphones are good when it comes to recording live sound setting or when recording high SPL instruments like guitars and drums. A good dynamic studio microphone would be the Shure SM7B.
Condenser mics are good at recording vocals. They are powered via phantom power marked +48V, so you will need t make sure your audio interface has a phantom power supply.
Condenser mics are more sensitive than dynamic mics and will tend to get more details. Condensers can further be broken down into large-diaphragm and small-diaphragm condenser mics. Small-diaphragm condenser mics are useful for recording drum overheads and various instruments.
If you are just getting started, a good large-diaphragm condenser mic would be more advantageous. You can then add a dynamic and later a small-diaphragm condenser mic as you upgrade your home studio. Make sure you don’t skimp on a microphone though, a poor quality microphone can be a source of background noise and microphone hiss.
Apart from the microphone, you will also need a microphone stand, so if possible make sure you mic ships or get a compatible mic stand. Microphone stands come in different shapes and sizes with each designed for a specific task.
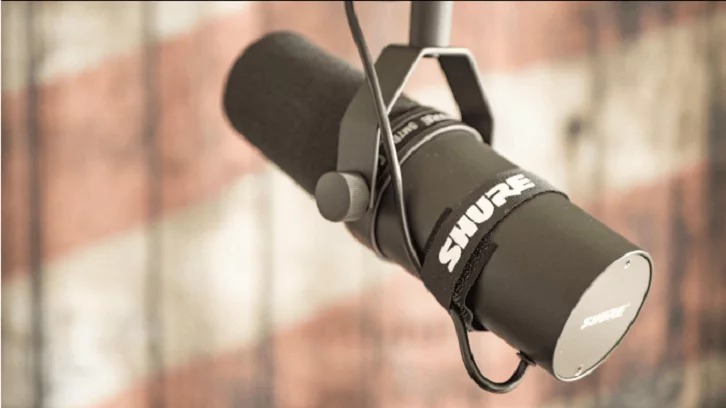
Shure Dynamic Microphone, XLR (SM7B)
Just like studio monitors, there are a special type of headphone for use in the studio. Whether you are recording or editing, studio headphones are invaluable equipment for your home studio. This is also the type of headphones that most podcasters wear.
Studio monitors and studio headphones work in the same way, i.e. they give you a balanced sound signature without enhancing any details of a recording. A regular headphone will not be of any help in a studio setting. You can use a regular result to hear how you recording sounds but never use it for mixing or editing.
There are two types of headphones you can get for your home studio, open-back, semi-open, and closed-back headphones. Closed back headphones are good to use when recording because they are designed to keep the sound from bleeding and being picked by the microphone. There are a number of good studio headphones in the market. Personally, I like the Sony MDR7506, the Sennheiser HD280PRO and the Superlux HD 681.
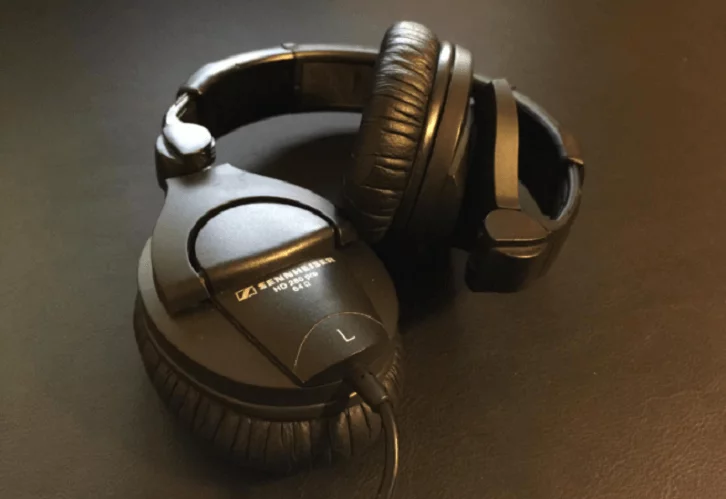
Sennheiser HD280PRO Studio Headphones
Open-Back headphones are good to use when mixing, critical listening, and referencing because they have a flatter frequency response and give out natural sound response.
Other than the design of the headphone, a studio headphone should also be comfortable and light to be worn for long studio sessions without getting fatigued.
Check Out Our Best Studio Headphones
Check Out Our Best Studio Headphones Under $100
In a studio setup, you are likely to find many cables with different connectors that you might not have heard of. Cables are useful because they will help to piece home recording studio equipment together.
At the start of your home studio setup, you should not compromise and get yourself cheap cables. With every piece in your setup connected with a cable, focusing on good quality ones is important.
A good quality cable does not have to cost you a thousand dollars. Cheap cables will not only require a replacement, but they will also get interference from noise by external and internal sources. The result is usually a hum, hiss, snaps, buzz, crackle, or popping sounds.
Other than passing the audio signal to and from your studio equipment, a quality cable should not have its sound. A balanced cable cancels out noise by having a positive signal and an inverted version of the signal. Unbalanced cables only carry the positive signal. Thus they can allow unwanted noise to be introduced to the signal transmitted.
Apart from getting a quality cable, there are also different connectors that are either male or female of each type. The main three connectors are XLR, TRS, and TS. XLR is short for Cannon’s X-Series Latching Rubber, TRS short for Tip/Ring/Sleeve, and TS short for Tip/Sleeve.
An external or a backup hard drive in a home recording studio can serve various functions. I would advise you to get a dedicated hard drive to not only free your computer’s internal hard drive but to also back up your data in case of any eventualities.
You can consider several things before getting a second drive. If you are using a desktop computer, you can install a second hard drive inside your computer or get a portable one. If you are using a laptop, a portable or external hard drive is a convenient choice for you.
There are also other features such as the port (USB, Firewire or Thunderbolt), The speed of the hard drive( a reasonable speed would be over 7200 rpm), and finally the size of the hard drive.
A pop filter is a net-like material placed between the singer’s mouth and the recording microphone. A pop filter works by catching the blasts of air caused when a singer pronounces “p” or “b” sounds before they hit the diaphragm of the microphone.
However, pop filters are not used with all types of microphones. They are mainly used on ribbon and condenser mics because of their high sensitivity levels. With dynamic microphones, you can either choose to have pop filter or you may not require it.
There are several factors you can consider when purchasing a pop filter, let’s discuss some of them.
The first would be the filtering material. Either the material can be perforated metal, foam material or woven nylon filters. While these two types work the same, each can give you different results when used. A woven nylon filter is one of the oldest and the industry standard. Modern pop filters are made out of woven or perforated metal.
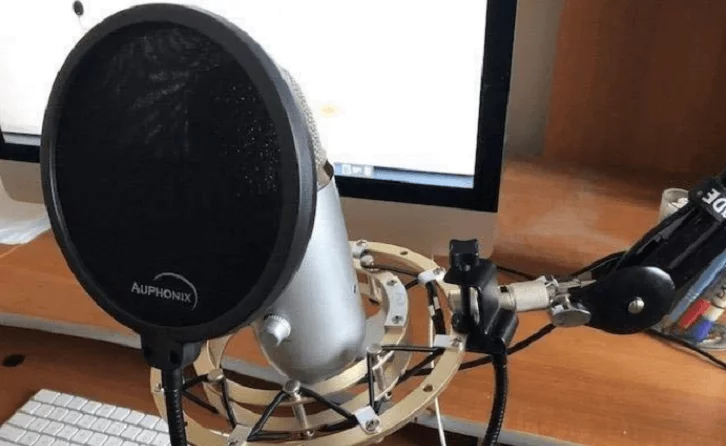
The Blue Yeti Pop Filter – 6-inch
Acoustic treatment of soundproofing a home studio is one of the important components you can do for your home recording studio. Usually, most people will neglect this area and would rather upgrade to a new mic.
If you are looking to set up your home studio in a spare bedroom or office space, most likely the area might not be conducive for recording or mixing music. A room that is not properly acoustically treated will affect the way you hear the sound even if you are using accurate monitors.
There are various ways you can work on to address the acoustics of a room. Completely sound treating a home studio can get expensive. However, even a few minor changes like fixing foam panels can cause drastic improvements. Applying foam or buying a set of bass traps can also be beneficial if you are on a budget.
You can also get creative and use mattresses or blankets — anything that will absorb even the tiniest of sound and prevent reflections.